This tutorial shows you how to take advantage of one of NetSuite's most convenient features: granting vendor access. Some CRM and ERP systems make it difficult to provide your vendors with the access they need. Luckily, it's simple with NetSuite!
NetSuite's Vendor Center
NetSuite has a section called the Vendor Center. This is what your vendors will see when you give them access to NetSuite. Here, they can see vendor-related records such as purchase orders and payment history. It's a convenient way for vendors to be able to see all of their previous orders, payments, and purchases without having to ask you questions about the details.
If you work with vendors that are used as resources on projects, they can track time spent on projects from their vendor center.
How to Grant Vendors Access to NetSuite
Before you're able to give out access to your vendor center in NetSuite, you'll need to enable this feature on your end. Then, once you've enabled it, you'll assign access to each vendor as needed.
Enable Vendor Access to NetSuite
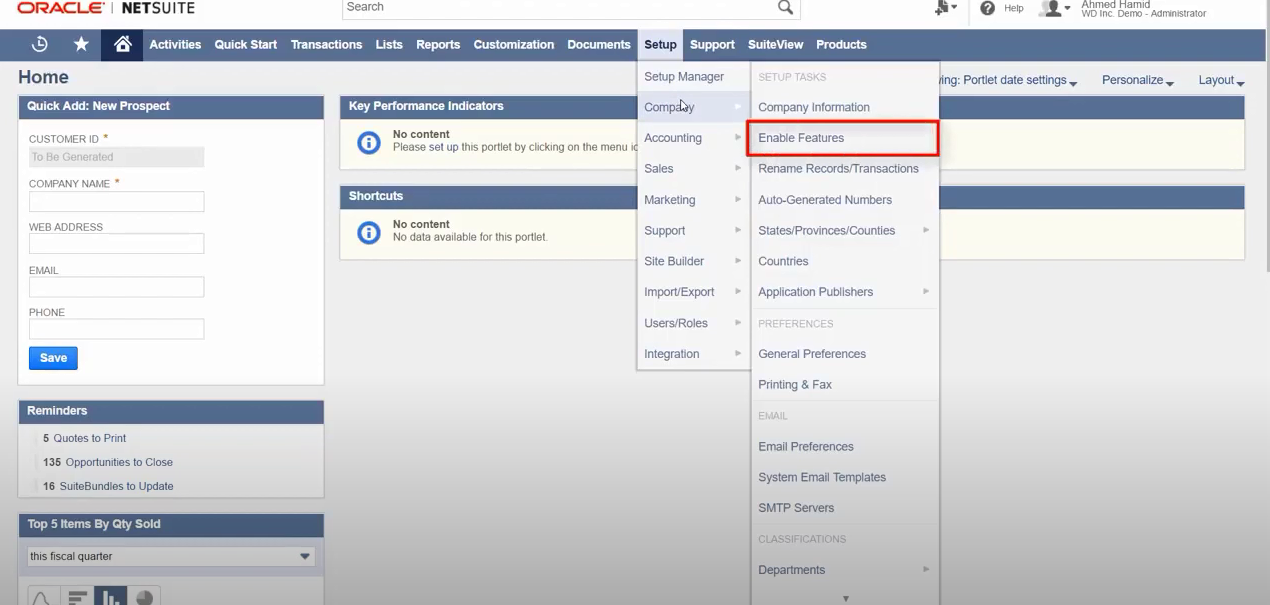
The first step is enabling vendor access to NetSuite:
- Click Setup in NetSuite's main navigation
- Hover over company, then click enable features. (Note: you'll need to be an administrator to access the following menu!
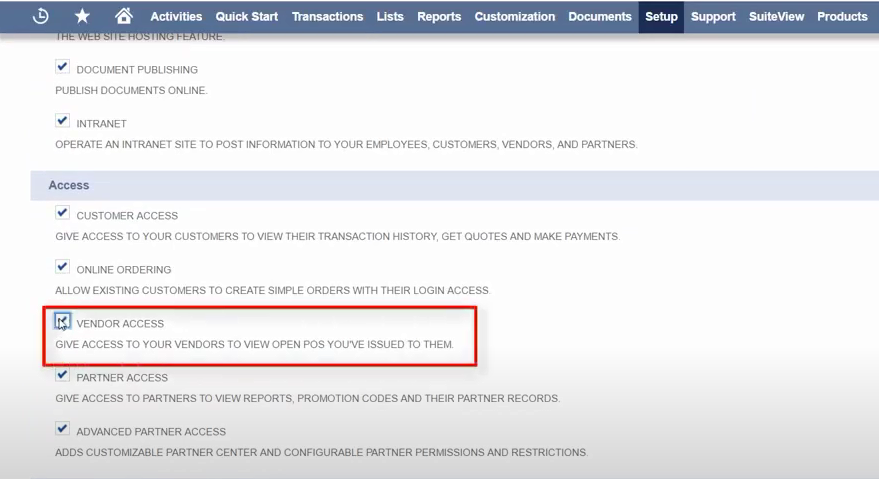
- Once you're in the enable features menu, click the web presence subtab.
- Scroll down to find the section titled Access
- Check the vendor access box
- Click save
Grant Vendors Access to NetSuite
Now, it's time to grant each vendor access to NetSuite as needed.
Navigate to the vendor record you're going to provide NetSuite access to. (You can do this by using the global search bar or viewing a list of all vendors.)
Tip: Use a search prefix in the global search bar to easily find vendor records. Type in ve: vendor name. For example, if your vendor's name was First Bank, you'd search ve: First Bank.
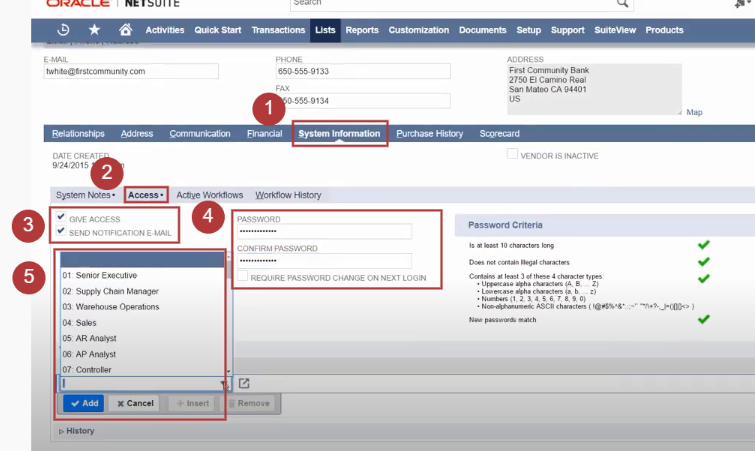
- Once you're in the vendor record, click the system information tab
- Click the Access tab
- Check the give access box. Also, check the send notification email box if you want your contact at the vendor company to receive an email with a link to the vendor center. It will be sent to the email you have on file for them.
- Set a password. If you want to give your vendors the ability to create their own password when they first log in, you can select the "require password change on next login" box after setting the password. This step is optional!
- Set the appropriate vendor role. This is usually one of the types under "vendor center". Then, press add.
- Scroll down and click save!
Once you've saved everything, the vendor can now log in to their vendor center! If you checked the option to send a notification email during the steps above, they can log in using that link. If not, they can go to NetSuite.com, click Log In in the upper right corner, and use the email listed in their vendor record with the password you set up.
Need Help Navigating NetSuite? Contact Us Today!
Whether you need help setting up vendor access, tailoring NetSuite for your custom needs, or any other ongoing NetSuite support and training, we can help! Contact us today for a free consultation.